As the vibrant hues of fall transform the Canadian landscape, homeowners across the country recognize that winter is on its way. With the impending frost and snow, ensuring that your lawn remains in the best shape possible throughout the cold months is essential. Here's a guide on how to winterize your lawn, deal with fallen leaves, and ensure your lawn mower is prepped and stored correctly so that when the snow melts, you’ve got the best looking lawn on the street.
1. Lawn Treatments for Winterizing
A. Fertilizing:
Fertilizing in the Fall is key to promoting deep root growth, which helps grass and plants survive the winter and come back green in the spring. Use a fertilizer that is high in potassium but lower in nitrogen. Potassium is a very helpful nutrient to plant life. It aids in disease resistance, promotes root growth, and regulates the processes within the grass plant. Experts recommend a one-two punch approach, fertilizing your lawn in early fall and again 6 to 8 weeks later for best results.
B. Aerating:
Aeration involves perforating the soil with small holes, allowing oxygen, water, and nutrients to reach grass roots. Early Fall is an ideal time for this since the grass can heal and fill in the open areas after aeration. This process ensures that your lawn's roots are healthy before they're buried beneath snow. If you have high-traffic areas and heavy thatch, you might want to aerate every year or 2. If your lawn looks great, you can cut back to every 3-5 years.
C. Overseeding:
If your cool-season lawn seems thin, or if there are bare spots in your lawn leftover from summer wear and tear, then fall is a great time to thicken a lawn by overseeding before winter arrives. Overseeding not only helps thicken the turf but ensures that newer grass varieties, which might be more drought-resistant and disease-tolerant, are introduced to the lawn. Be sure to water regularly. Be sure to keep the soil surface moist by watering each day, or as needed, until the seeds are established and the new grass has grown high enough to be mowed (about 3 inches). *It's Important to space out your seeding and fertilizing as fresh fertilizer can damage fresh seeds and seedlings.*
2. Managing Fallen Leaves
While the fall foliage may be a sight to behold, the fallen leaves need some attention:
A. Raking Or Mulching
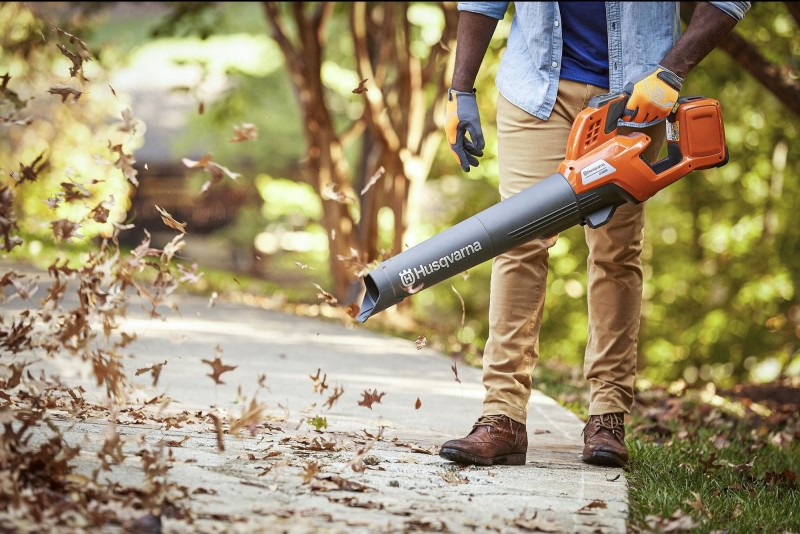
It's crucial to rake or mulch leaves before they become wet from rain or morning dew. Contrary to popular belief, fallen tree leaves will not insulate your lawn during winter. If left unchecked, wet leaves can create a mat on the lawn, suffocating it, blocking vital sunlight, and promoting fungal diseases. Instead of raking and bagging leaves, consider mulching them with your lawn mower. Mulched leaves decompose and act as a natural fertilizer for your grass. The perfect sized mulch is made by reducing your leaf clutter to dime-size pieces. You'll know you're done when about half an inch of grass can be seen through the mulched leaf layer. Once the leaf bits settle in, microbes and worms get to work recycling them. Any kind of rotary-action mower will do the job, and any kind of leaves can be chopped up. With several passes of your mower, you can mulch up to 18 inches of leaf clutter.
B. Composting:
If there are multiple large trees on your property mulching may not be enough and you will have to rake the leaves. If this is your situation, consider adding them to your compost pile. Mixed with other organic materials, these leaves will break down and provide nutrient-rich compost for your garden in the spring.
3. Lawn Mower Maintenance and Storage
In order to keep the new Lawn Mower you bought from 404 Stone this summer working for years to come, its important to properly store and maintain it. Take a few extra steps in the fall to make spring mowing a breeze. Your owner's manual comes with instructions for maintenance, so be sure to look at it. Below are some general tips for what to do before you put away your lawnmower.
A. Clean the Mower:
Before storing your lawn mower, ensure it's free from grass clippings and debris. Use a putty knife or wire brush to scrape off grass and mud from the mower deck. Cleaning the Mower thoroughly can ensure there is nothing that will hinder your mower from starting or performing at its best after months of storage. Servicing the air filter may also be a part of your cleaning routine.
B. Drain Fuel:
Fuel left in a mower over winter can deteriorate and cause starting problems next year. It's best to run your mower until the fuel tank is empty. Alternatively, you can add a fuel stabilizer to the remaining gas.
C. Change Oil and update internal parts:
Old oil can contain contaminants that harm the engine. Before storing, change the oil. Also, replace the air filter and spark plug, and service the pistons as instructed in the owner's manual, ensuring your mower will run efficiently next season.
D. Remove and Sharpen Blades:
After a season's worth of mowing, your mower's blades will likely be dull. Remove them for sharpening or replacement. Sharp blades cut grass more efficiently, promoting better lawn health and putting less strain on your mower.
E. Store Indoors:
If possible, store your lawn mower indoors in a dry, cool place. Protect it from winter moisture and temperature fluctuations.
4. Add Mulch to your Garden in the fall
A. Save Time and Money:
Set yourself up for less work in spring! Fall mulching saves time and energy as it cuts down on weeds popping up in spring. Adding Mulch can also save the effort of spreading new soil as the mulch will prevent soil erosion that may happen with freezing and thawing cycles. Mulch to protect your gardens may also save you money as mulched perennials are more likely to survive winter, reducing the need to buy new blooms in spring.
B. Provide Insulation:
Mulching helps to insulate plant roots by raising the freezing point of the soil and leveling out the temperature fluctuations that are most common in autumn. Cycles of freezing and thawing can wreak havoc on delicate root systems and a layer of mulch can reduce the impacts of these temperature swings, helping your plants remain strong and experience less stress.
C: Enrich Soil
Mulch is natural organic material and as the organic matter in mulch breaks down, it releases nutrients, minerals and nitrogen to enrich your soil throughout fall and winter. Healthier soil leads to healthier shoots and blooms in spring! Fall mulching also gives soil-improving earthworms and microbes added warmth and quality food for the winter.
D: Prepare Your Garden:
Cut back perennials for winter, and you create a clean bed surface that makes mulching a snap. There's no dodging emerging bulbs, perennial shoots or seedlings. The bonus is that cutting perennial stems down in fall takes that chore off your spring to-do list. For best mulching results, you need to cut back perennial stems to 6- to 12-inch stubs so you can apply mulch evenly around them. Ideally it is best to start mulching before frost as you don’t want moisture trapped between the soil and the mulch.
In conclusion, while the Canadian winter might seem daunting for lawn enthusiasts, with the right preparation, you can ensure your green oasis remains robust and ready to bloom once spring returns. A combination of lawn treatments, leaf management, and lawn mower care will give you a head start on the next gardening season.


